Offline transaction signing
To troubleshoot common issues, see Help: Airgapped signing issues.
Offline transaction signing (or airgapped signing) is a method of signing transactions without exposing the private spend key to a computer that is connected to the internet. Conceptually, it is similar to how a hardware wallet functions, except the process is done manually.
Two devices are required: one device connected to the internet that hosts a view-only wallet (“the online device”), and a second airgapped device that hosts a corresponding wallet containing the secret spendkey (“the offline device”). The offline device is typically a laptop or desktop computer stripped of any network interfaces that is used exclusively for the purpose of offline transaction signing.
The procurement and setup of the offline device is outside the scope of this guide. However, we recommend installing a lightweight linux distribution with an encrypted filesystem on the offline device.
Transactions are constructed using the view-only wallet on the online device, then signed with the offline wallet on the offline device and later broadcast to the network using the view-only wallet on the online device or via another means such as a transaction pusher.
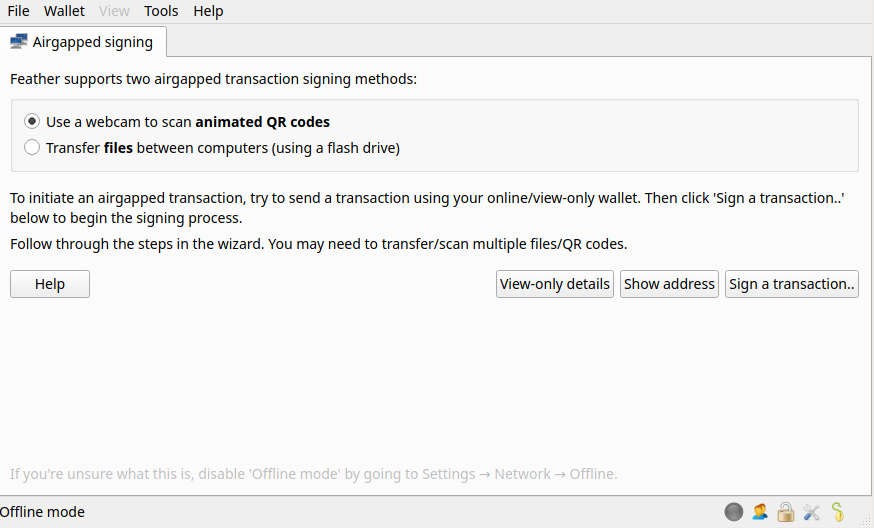
Feather supports two airgapped transaction signing methods:
- Using a webcam to scan animated QR code (Uniform Resources, or UR for short)
- By transferring files between computers (using a flash drive or SD card)
For this guide we assume you will be using animated QR codes.
A note on webcams
You will need to scan QR codes using both devices. We recommend getting two (cheap) detachable USB webcams, one for each device. If you are short on budget, get one USB webcam that you can switch between devices. A resolution of 720P is sufficient.
It’s possible to use a laptop’s built-in webcam for one side, but this is less practical. You may need to hold up your laptop in front of the other screen to get it to scan a QR code.
Initial Setup
Creating a new offline wallet
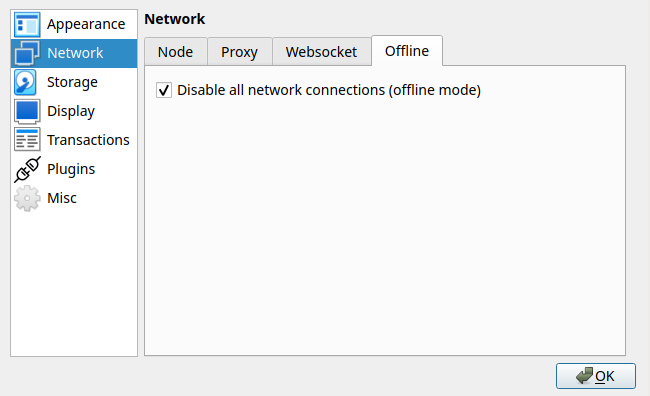
On the offline device, go to Settings → Network → Offline. Make sure ‘Disable all network connections (offline mode)’ is checked.
Then, create a new wallet. Do not forget the write-down your seed and store it in a secure place.
After opening the wallet, your UI should look like this:
Note that you are not able to access your transaction history or balance from the offline wallet. It does not store transaction records or outputs (even imported ones), as it is unable to keep an accurate history due to it not being connected to a node. You can view your transaction history in the view-only wallet.
Creating a view-only wallet
Now that you have your offline wallet set up, you need to create a corresponding view-only wallet on the online device.
Three pieces of information are required for this: secret view key, primary address, and restore height.
The easiest way to transfer this information to your online device is scanning a QR code.
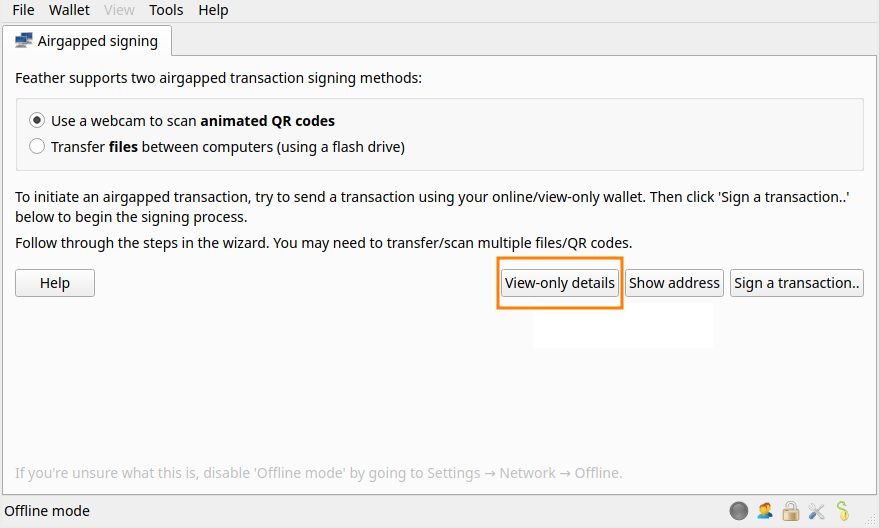
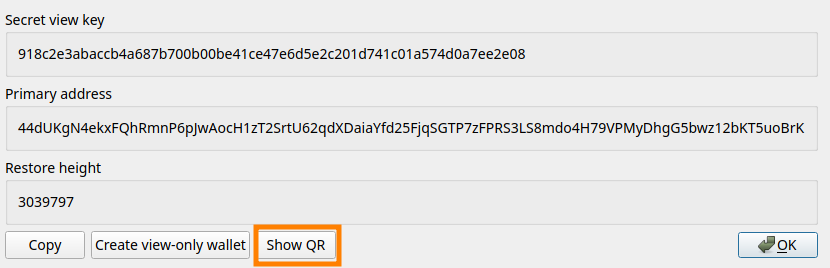
Press View-only details, then press Show QR.
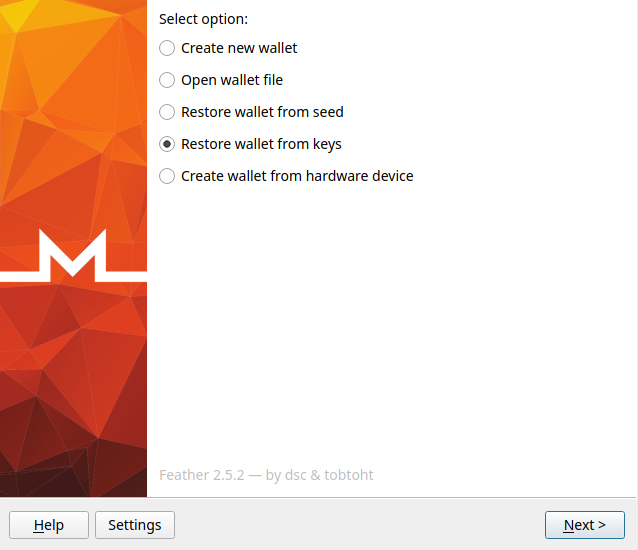
On the online device, open the wizard and select Restore wallet from keys and press Next.
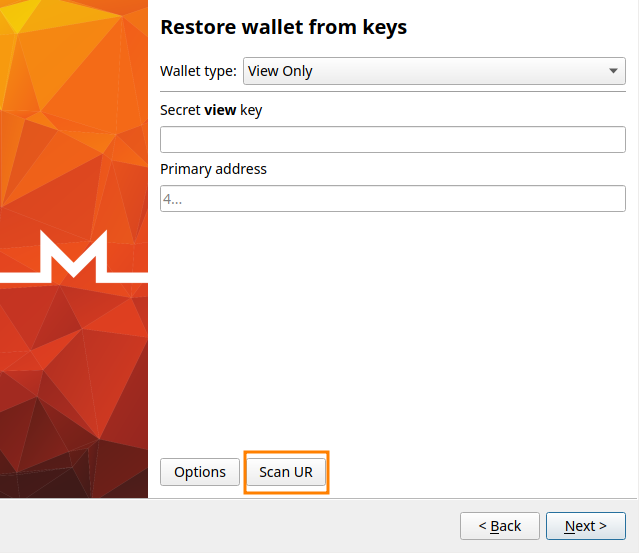
Press Scan QR and scan the code shown on the offline device. If you have trouble scanning the QR code, see Help: Airgapped signing issues for tips.
If everything went right, the dialog should close automatically and autofill the view-only details.
Step through the wizard.
- You do not need to adjust the restore height.
- You may choose a different wallet name.
- Remember to set a strong password.
Fund your wallet
On the view-only wallet, go to the Receive tab and copy an unused address. Or see Primary adress if you need your wallet’s primary address.
If you assume that the view-only is compromised, you can verify the address using the offline wallet.
- On the offline wallet, click Show address.
- Enter the index of the address. You can find this number on the Receive tab of the view-only wallet, to the left of the address.
- Verify that the address matches.
Sending a transaction
To initiate an airgapped transaction, try to send a transaction on your view-only wallet.
A wizard will pop up showing an animated QR code.
If this is your first time sending a transaction from this wallet, you will need to synchronize the key images. Don’t worry, the wizard will guide you through this.
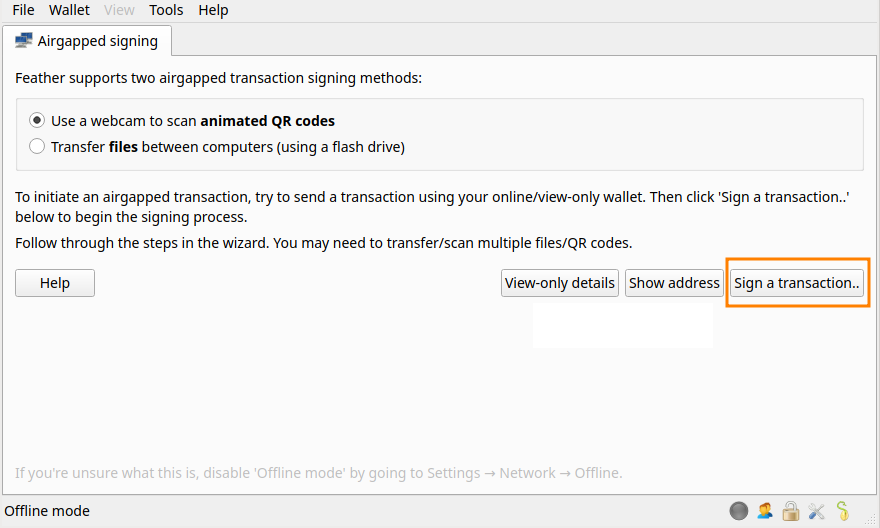
To scan the animated QR code, click Sign a transaction.. on the offline wallet. A dialog will show up that looks like this:
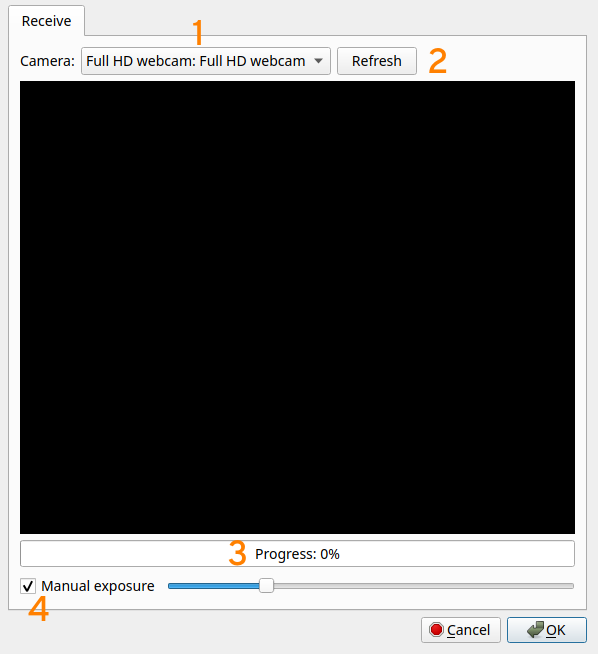
Familiarize yourself with the scanning UI:
- If you have multiple cameras, you can click here to switch between cameras
- You can click on ‘Refresh’ to refresh the list of cameras
- This progress bar will fill up as you scan fragments. If it appears to get stuck on 99%, keep scanning.
- If you have trouble scanning the QR code due to glare, you can enable manual exposure here if your camera supports it. Use the slider to adjust the exposure level.
Follow the instructions in the wizard. Or continue reading here to go step by step.
Step by step
Step 1: scan the outputs (offline wallet)
Scan the QR code shown on the view-only wallet with your offline wallet.
After the scan is complete, the offline wallet will automatically advance to the next step.
Step 2: scan the key images (view-only wallet)
On the view-only wallet, click Next to move it to step 2.
Now scan the animated QR code shown on the offline wallet with the view-only wallet.
The interface may freeze for a moment upon reaching 100%. Wait a few seconds.
The view-only wallet will now begin constructing a transaction. If anything goes wrong here, simply try resending your transaction. You will not have to do steps 1 and 2 again.
Step 3: scan the unsigned transaction (offline wallet)
After the transaction is constructed, an animated QR code will show up on the view-only wallet.
On the offline wallet, click Next to move to step 3.
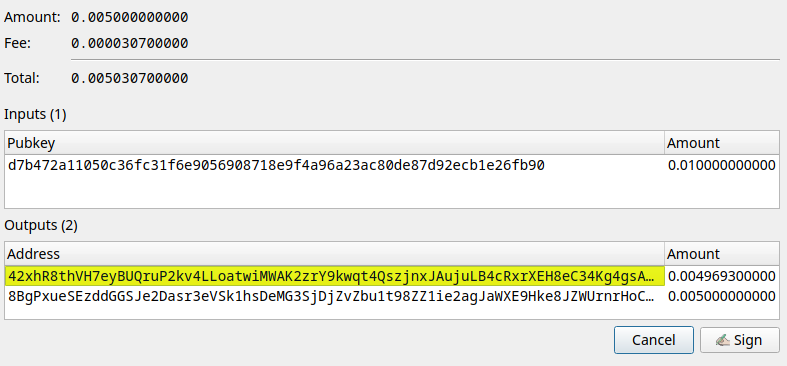
After the scan is complete, a window will pop up showing you the transaction details. There will typically be two outputs, one ‘change’ output that goes back to your wallet. This output has a yellow or green background. The other one is the address you’re sending money to.
Confirm the transaction details. Click Sign.
Step 4: scan the signed transaction (view-only wallet)
On the view-only wallet, click Next to move it to step 4.
Scan the animated QR code shown on the offline wallet with the view-only wallet.
After the scan is complete, a dialog will pop up asking you to confirm sending the transaction. You have just sent an airgapped transaction!
The next time you create a transaction, you will likely not have to go through steps 1 or 2.